Hey fellow tech adventurers and Linux warriors!
Hello tech adventurers. Greetings, Linux warriors. Have you ever stared at your screen blankly, wondering why your cutting-edge hardware acts like it’s from the Stone Age?
Ever felt like your brand-new, ultra-fancy screen is deliberately trolling you? It arrives fresh out of the box. It is brimming with promises of visual splendor. Then it delivers a resolution that makes you question your life choices? Well, pull up a chair. Grab a beverage, preferably something strong. Let me tell you about my recent, utterly absurd, and ultimately victorious battle. This battle was with the magnificent 57-inch Samsung Odyssey Neo G9 Dual 4K UHD Quantum Mini-LED Curved Gaming Monitor! It’s monstrous and sometimes downright mischievous.
I mean, the name alone sounds like it should grant you superpowers, right? It boasts a mind-bending 7,680 x 2,160 resolution and a blistering 240Hz refresh rate. My brain was filled with dreams of expansive spreadsheets. I imagined immersive gaming. I saw an endless canvas for coding. I envisioned a glorious, seamless desktop. My reality, though, was a pixelated punch to the gut.
xrandr
Screen 0: minimum 16 x 16, current 3840 x 1080, maximum 32767 x 32767
HDMI-A-1 connected 3840x1080+0+0 (normal left inverted right x axis y axis) 1400mm x 400mm
    3840x1080     59.96*+
# ... and a bunch of other resolutions that definitely weren't 7680x2160“3840×1080? On a display that’s literally two 4K screens stitched together?” I thought, my eye twitching. “This is like buying a Ferrari and finding out it’s capped at 30 MPH.”
What I thought the problem was – and what it REALLY was!
The journey began, as many Linux sagas do, with a healthy dose of xrandr and a sprinkle of desperation. My immediate thought? “It’s the cable, stupid!” (My internal monologue is very supportive, clearly). I was on HDMI, and while my glorious NVIDIA GeForce RTX 5090 (yes, I humble-bragged, sue me) supports HDMI 2.1, and the monitor does too, sometimes the universe just decides to be difficult.
So, like any self-respecting Linux gamer, I upgraded to a fancy-schmancy DisplayPort 1.4 cable. The anticipation was palpable. Would this be it? Would my digital world expand?

Booting up, I saw the early boot text and logos shrink. “AHA!” I exclaimed, startling my cat. “Progress! Tiny text means MORE PIXELS!”
xrandr
Screen 0: minimum 16 x 16, current 3840 x 1080, maximum 32767 x 32767
DP-1 connected 3840x1080+0+0 (normal left inverted right x axis y axis) 1400mm x 400mm
    3840x1080     59.96*+
# ... still no 7680x2160! The audacity!The Plot Thickens: Xorg vs. Wayland vs. NVIDIA’s Secret Agenda
Okay, so the cable wasn’t the entire story. My trusty Arch Linux setup, with its bleeding-edge kernels and NVIDIA drivers, was playing games. This was getting personal. The xrandr output, showing “DP-1 connected,” confirmed the DisplayPort was recognized. But why the persistent 3840×1080 in the OS? A quick peek into nvidia-settings revealed the grim truth: no “X Server Display Configuration” option! This meant my NVIDIA card wasn’t truly in charge of the display once Xorg loaded. The culprit? My system had both an Intel iGPU and the RTX 5090. It wasn’t properly handing off display duties to the discrete GPU.
lspci -k | grep -EA3 'VGA|3D|Display'

00:02.0 VGA compatible controller: Intel Corporation Arrow Lake-S [Intel Graphics] (rev 06)
	DeviceName: Onboard - Video
	Subsystem: Micro-Star International Co., Ltd. [MSI] Device 7e34
	Kernel driver in use: i915
--
02:00.0 VGA compatible controller: NVIDIA Corporation GB202 [GeForce RTX 5090] (rev a1)
	Subsystem: Micro-Star International Co., Ltd. [MSI] Device 5303
	Kernel driver in use: nvidia
Kernel modules: nouveau, nvidia_drm, nvidiaIt was time for some serious Xorg configuration. I backed up my existing xorg.conf (because, let’s be honest, you always backup before messing with Xorg) and whipped up a new file: /etc/X11/xorg.conf.d/20-nvidia.conf. This little beauty explicitly told Xorg: “Hey, buddy. This RTX 5090 is the PrimaryGPU. We’re aiming for a virtual screen size of 7680×2160!”
*This is generally preferred over modifying /etc/X11/xorg.conf directly, as it allows for modular configuration.
Section "ServerLayout"
    Identifier "layout"
    Screen 0 "nvidia"
    Inactive "intel"
EndSection

Section "Device"
    Identifier "nvidia"
    Driver "nvidia"
    BusID "PCI:2:0:0" # This must match your RTX 5090's BusID from lspci
    Option "AllowEmptyInitialConfiguration" "true"
    Option "PrimaryGPU" "yes" # Explicitly declare this as the primary GPU
    # Option "TripleBuffer" "true" # Can sometimes help with tearing, but try without first
EndSection

Section "Screen"
    Identifier "nvidia"
    Device "nvidia"
    Monitor "monitor"
    # Option "DPI" "96 x 96" # You might need to adjust DPI later if scaling is off
    # Set the desired resolution here as a default mode
    SubSection "Display"
        Virtual 7680 2160
        Modes "7680x2160_240" "7680x2160_120" "7680x2160_60" # Add modes explicitly
    EndSubSection
EndSection

Section "Device"
    Identifier "intel"
    Driver "modesetting" # Or "intel" for older Intel GPUs
    BusID "PCI:0:2:0" # This must match your Intel GPU's BusID from lspci
EndSection

Section "Monitor"
    Identifier "monitor"
    Option "DPMS" "true"
EndSectionA deep dive into the Xorg logs revealed the truth!
[ 4.593] (WW) NVIDIA(0): No valid modes for "DFP-1:7680x2160_240"; removing.
[ 4.595] (II) NVIDIA(0): Validated MetaModes:
[ 4.595] (II) NVIDIA(0):     "DFP-1:7680x2160_120"
[ 4.595] (II) NVIDIA(0):     "DFP-1:7680x2160_60"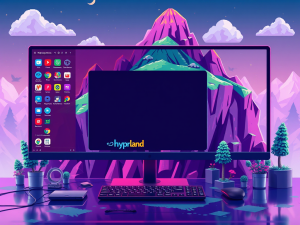
[ 4.812] (II) NVIDIA(0): Setting mode "DFP-1:7680x2160_120"“AHA AGAIN!” I cried, startling the cat once more. The NVIDIA driver was seeing the glorious 7680×2160 resolution, but it was throwing a little tantrum about 240Hz. Fair enough, I’ll take 120Hz for now – that’s still mind-blowing for this many pixels! The problem was that my lovely SDDM login screen was showing it correctly. However, once I logged into Hyprland, it was back to square one. Hyprland is my current Wayland obsession.
| Stage | Display Server | Resolution | Reason |
|---|---|---|---|
| Boot/SDDM Login | Xorg | 7680×2160@120Hz | NVIDIA driver taking control |
| After Login | Hyprland | 3840×1080@60Hz | Hyprland’s config overriding/not seeing mode |
The Final Frontier: Taming Hyprland!
This meant it wasn’t just a driver or cable issue anymore; it was a configuration battle with my Wayland compositor. This was it. The ultimate showdown. My Wayland compositor, while fantastic, wasn’t going to just assume I wanted all those luscious pixels. I needed to explicitly tell it. A quick hyprctl monitors revealed the official name Hyprland was using for my monitor (DP-1).
Then, with bated breath, I edited my ~/.config/hypr/hyprland.conf. The magical line that brought it all together:
# Found monitor name with hyprctl monitors (essential step!)
monitor=DP-1,7680x2160@120,auto,1 # The magical line!A quick nano ~/.config/hypr/hyprland.conf, a strategic restart of Hyprland, and BOOM! My desktop erupted into a glorious, expansive panorama of 7680×2160 pixels! The feeling of victory was sweeter than a perfectly compiled kernel.
hyprctl monitors
Monitor DP-1 (ID 0):
    7680x2160@119.99700 at 0x0
    description: Samsung Electric Company Odyssey G95NC HNTY303302
# ... and a list of available modes that now includes the target resolution!Lessons Learned (and a word on scaling!)
So, what did this hilarious, pixel-pushing adventure teach me?
- Cable Matters! A LOT! Especially for high-resolution gaming monitors like the Odyssey Neo G9. Invest in a certified DisplayPort 1.4 cable (or even DP 2.1 if you can find one easily for future-proofing!).
- Linux Loves Specificity: While
nvidia-drm.modeset=1is great, sometimes you need to get down and dirty with Xorg configurations to ensure the right GPU (20-nvidia.conf) is driving the display. - Wayland Compositors Need Love Too: Don’t assume your Wayland desktop environment will magically inherit optimal settings. Check its config files, especially for Hyprland users!
- Read the Logs! The Xorg.0.log file was the true hero here, explicitly stating what modes the NVIDIA driver validated. It saved me from endlessly chasing the mythical 240Hz. The actual validated limit was 120Hz for 7680×2160 on my current setup.
- Embrace the Process: Troubleshooting complex tech setups on Linux can be frustrating. However, the feeling of victory is unparalleled when it finally clicks. Plus, you get a funny blog post out of it!
Oh, and one more thing: at 7680×2160 resolution with a scale: 1, everything is comically tiny! I’m essentially reading ant-sized text. Below is finding the perfect scaling factor (probably 1.5 or 2) for you to make this ultra-wide masterpiece usable without a magnifying glass.
Try scale=1.5 or scale=2 in your monitor line in hyprland.conf. For example:
monitor=DP-1,7680x2160@120,auto,1.5
or
monitor=DP-1,7680x2160@120,auto,2
Leave a Reply